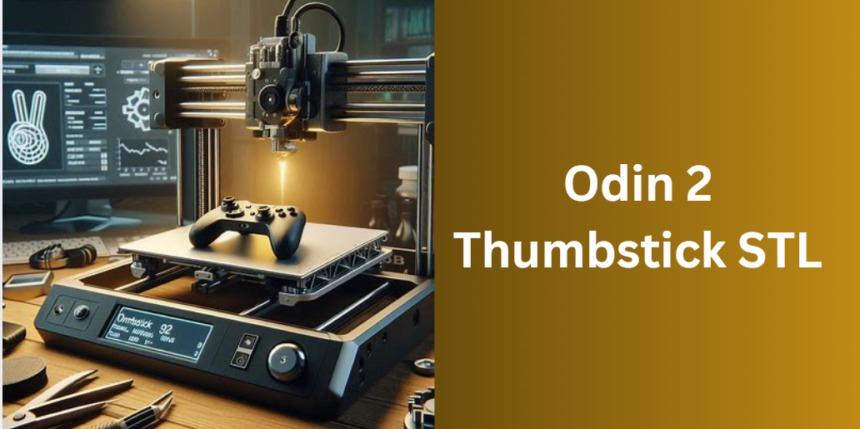
Understanding the Odin 2 Thumbstick STL is essential for anyone interested in creating custom components for gaming controllers or similar devices. This STL file serves as a digital blueprint that allows you to produce a high-quality thumbstick using your 3D printer. Unlike pre-manufactured parts, the Odin 2 Thumbstick STL offers you the flexibility to modify and adapt the design to meet your specific ergonomic and aesthetic needs. This guide is crafted to serve as a one-stop resource, covering the entire journey from downloading the file to advanced customization and future innovation trends.
The primary objective of this article is to empower you with detailed knowledge about the Odin 2 Thumbstick STL, guiding you through its origins, technical specifications, material considerations, and the step-by-step printing process. Alongside these technical aspects, we will also explore how the maker community has driven continuous improvement in this design.
Background and Overview
History of Thumbstick Designs
The evolution of thumbstick components in gaming controllers has been influenced by both technological advancements and user demands for greater comfort. Traditional thumbsticks were integrated into the controller design, often limiting their longevity and customization options. With the advent of 3D printing, makers began exploring ways to produce replacement parts that could be easily customized. The Odin 2 Thumbstick STL emerged as a product of this creative exploration, reflecting the need for a design that is both durable and adaptable.
The Origins of the Odin 2 System
The Odin 2 system was born out of a collaborative spirit within the maker community. Early 3D printing enthusiasts experimented with various designs to replace worn-out thumbsticks on their controllers. Through community feedback and iterative design improvements, the Odin 2 Thumbstick STL was developed. Its open-source nature allowed for continuous modifications, ensuring that the design remained at the cutting edge of ergonomic and functional excellence.
Understanding STL Files and 3D Printing Basics
STL files, like the Odin 2 Thumbstick STL, contain the three-dimensional geometrical data required to print an object layer by layer. Once you have the STL file, it is imported into slicing software where you set parameters such as layer height, print speed, and infill density. This file format is fundamental for any 3D printing project, as it bridges the gap between digital design and physical creation. The process is straightforward: download, slice, and print, making 3D printing accessible to both hobbyists and professionals.
Features and Design of the Odin 2 Thumbstick STL
Key Design Characteristics
The Odin 2 Thumbstick STL is renowned for its ergonomic design, which has been carefully engineered to reduce strain during extended use. Its curves and dimensions have been optimized for a comfortable grip, ensuring that the thumbstick fits naturally in your hand. This file not only caters to functionality but also emphasizes aesthetic appeal, offering a sleek design that can be customized further according to individual preferences.
Material Considerations for Printing
Choosing the right material for printing the Odin 2 Thumbstick STL is crucial to achieving the desired durability and performance. Many makers prefer using PLA for its ease of use and smooth finish, although ABS and PETG are also popular for their strength and resilience.
Customization and Modification Potential
One of the most exciting aspects of the Odin 2 Thumbstick STL is its adaptability. The design is fully customizable using popular CAD software such as Fusion 360, Tinkercad, or FreeCAD. You can adjust dimensions, add textures, or incorporate personalized elements to enhance both comfort and style. The flexibility of the Odin 2 Thumbstick STL means that you are not limited to a single design; instead, you have the opportunity to innovate and experiment, making it truly your own.
Downloading and Preparing the STL File
Where to Find the Odin 2 Thumbstick STL
Locating the Odin 2 Thumbstick STL is simple when you know where to look. Trusted platforms like Thingiverse and GrabCAD are excellent sources where you can download the file. These sites provide not only the file but also user feedback, printing tips, and modifications that have been shared by the community. By choosing a reputable source, you ensure that you are working with the most reliable version of the design.
Preparing the File for 3D Printing
After downloading the Odin 2 Thumbstick STL, the next step is to prepare it for printing. Import the file into your preferred slicing software—be it Cura, PrusaSlicer, or Simplify3D. In this stage, you will adjust essential settings such as layer height, print speed, and infill percentage. It is crucial to tailor these settings to match your printer’s capabilities and the material you have chosen, ensuring the best possible print quality.
Printer Settings and Calibration Tips
Before printing, proper calibration of your 3D printer is paramount. Ensure that your printer’s bed is leveled, the nozzle is aligned correctly, and the filament is loaded properly. These calibration steps help prevent common issues such as warping and layer misalignment. Taking a few moments to verify these settings can save time and improve the overall quality of your printed thumbstick.
Step-by-Step Printing Process
Pre-Printing Checklist
Before initiating the printing process, it is advisable to run through a pre-printing checklist. Confirm that your printer is calibrated, select the appropriate filament, and review the STL file for any potential errors. This preparatory phase is essential for avoiding unexpected interruptions during the print.
Printing the Thumbstick
As the printing process begins, you will see your Odin 2 Thumbstick STL materialize layer by layer. Although the process is largely automated, it is important to periodically check the progress to ensure that no issues arise. Depending on the complexity of the design and your printer’s speed, the printing process may take several hours. Patience and careful monitoring are key to a successful print.
Post-Processing and Finishing Touches
After the print is complete, post-processing is necessary to achieve a professional finish. This phase includes the removal of any support structures, sanding down rough edges, and, if desired, applying a final coat of paint or a textured grip. These finishing touches not only enhance the appearance of the thumbstick but also improve its functionality, ensuring a comfortable and reliable user experience.
Customization and Advanced Modifications
Using CAD Software for Customization
The Odin 2 Thumbstick STL’s design is fully open to customization. By importing the file into CAD software, you can modify the design to suit your specific needs. Whether you need to resize the thumbstick for a different controller or add unique texture features for enhanced grip, the flexibility of the design allows for endless creative possibilities. Experimentation in CAD software can lead to innovative improvements that set your version apart from the standard design.
Sharing and Collaborating with the Community
One of the most rewarding aspects of working with the Odin 2 Thumbstick STL is the vibrant maker community that surrounds it. By sharing your modifications and printing experiences on platforms like Thingiverse or Reddit, you contribute to a collective knowledge base that benefits everyone. Community collaboration often leads to further refinements and creative ideas, making the open-source nature of the design a powerful tool for continuous improvement.
Case Studies and Success Stories
Real-life examples of successful customization highlight the practical benefits of the Odin 2 Thumbstick STL. For instance, one enthusiast enhanced the design by incorporating additional grip textures, resulting in a significant improvement in control during gaming sessions. Another user resized the thumbstick to better match their custom controller, leading to a more ergonomic experience. These case studies underscore the versatility and value of a design that can be tailored to meet diverse needs.
Troubleshooting and Maintenance
Common Printing Issues and How to Resolve Them
Despite careful preparation, printing issues can sometimes occur. Problems such as layer misalignment, poor adhesion, or filament jams can interrupt the printing process. To address these challenges, it is important to ensure that the print bed is clean and properly leveled, and to recalibrate your printer if necessary. Adjusting retraction settings can also help prevent stringing and improve print quality. By addressing issues promptly, you can ensure that your Odin 2 Thumbstick STL prints are consistently successful.
Post-Print Maintenance Tips
Maintaining your printed thumbstick is essential for long-term durability and performance. Gentle cleaning, careful handling, and proper storage can help extend the lifespan of your component. Periodically inspect the thumbstick for signs of wear and make minor repairs as needed. These maintenance practices not only preserve the functionality of the thumbstick but also ensure that it continues to provide reliable performance over time.
Comparative Analysis with Other Thumbstick Designs
Feature Comparison with Competing Designs
A comparative analysis highlights the strengths of the Odin 2 Thumbstick STL when compared to other popular thumbstick designs. The Odin 2 Thumbstick STL stands out for its balanced ergonomics, extensive customization options, and robust community support.
User Testimonials and Reviews
Feedback from users who have printed and customized the Odin 2 Thumbstick STL reinforces its practical advantages. Many users report that the design is not only comfortable but also highly adaptable to various needs. Their testimonials often emphasize the ease with which they were able to modify the file to improve both functionality and aesthetics, further solidifying the reputation of the Odin 2 Thumbstick STL as a top-tier design in the maker community.
Future Trends and Innovations
Emerging 3D Printing Technologies
The landscape of 3D printing is rapidly evolving with emerging technologies that promise even greater precision and efficiency. Future advancements in printer resolution, multi-material printing, and faster production times are likely to further enhance the capabilities of the Odin 2 Thumbstick STL. As these innovations continue to develop, makers can expect to see improved durability and even more refined prints.
Predictions for the Evolution of Thumbstick Designs
As the maker community continues to refine thumbstick designs, the evolution of the Odin 2 Thumbstick STL is expected to be influenced by ongoing collaborative efforts. Experts predict that future iterations will incorporate feedback from a broader user base, leading to designs that are even more ergonomic and feature-rich. The open-source nature of the file ensures that innovation will be a constant, driven by a community that values continuous improvement.
Integrating Smart Technologies
Looking to the future, there is potential for integrating smart technologies into thumbstick designs. Imagine a thumbstick that not only offers superior ergonomics but also includes sensor technology to monitor usage patterns or provide real-time feedback. Although such innovations are in their infancy, they represent an exciting frontier that could redefine the functionality of 3D printed controller components.
FAQ’s About Ultimate Guide to Odin 2 Thumbstick STL
What Licensing and Usage Rights Apply to the Odin 2 Thumbstick STL, and Can It Be Used Commercially?
The licensing for the Odin 2 Thumbstick STL typically falls under open-source or Creative Commons agreements, but it is important to check the specific license details provided by the uploader on the hosting platform. Although many creators share their designs with the intent of fostering community innovation and improvement, some licenses may restrict commercial use or require attribution if you modify or distribute the file. Before using the Odin 2 Thumbstick STL in any commercial project, take a moment to review the accompanying license information on sites like Thingiverse or GrabCAD, ensuring that your planned modifications and applications are compliant with the author’s terms.
Is the Odin 2 Thumbstick STL Universally Compatible with All 3D Printers, or Are Specific Printer Types Recommended?
The Odin 2 Thumbstick STL is designed with versatility in mind and is generally compatible with most FDM (Fused Deposition Modeling) 3D printers. However, optimal results may depend on your printer’s resolution, nozzle size, and overall build volume. While many makers have successfully printed the design on a variety of machines, users with high-end printers or those who have made custom modifications to their hardware might find that tweaking the slicing parameters further enhances the print quality. Checking printer specifications and running a small test print can help determine the ideal settings for your particular model.
How Often Is the Odin 2 Thumbstick STL Updated by Its Creators, and Where Can I Find the Latest Revisions?
Updates to the Odin 2 Thumbstick STL are driven by community feedback and ongoing design improvements. While the core design remains stable, enhancements are periodically introduced to refine ergonomics, improve printability, or incorporate new features based on user suggestions. To stay informed about the latest revisions, it is advisable to follow the file on platforms like Thingiverse or GrabCAD, where version histories and user comments are regularly updated. Engaging with the community through forums or social media groups dedicated to 3D printing can also help you keep track of new iterations and share your own experiences.
Can the Odin 2 Thumbstick STL Be Integrated with Other Custom 3D Printed Components to Build a Full Custom Controller?
Yes, the Odin 2 Thumbstick STL can serve as a modular component in broader custom 3D printed controller projects. Integrating it with other parts requires careful attention to design tolerances and compatibility between different components. When planning a full custom controller, ensure that the dimensions and mounting features of each printed piece are well-coordinated. This might involve using CAD software to adjust the design parameters so that all parts interlock seamlessly. Being mindful of material properties and post-processing requirements for each component can further enhance the overall functionality and aesthetic of your custom build.
What Environmentally Friendly Practices Can I Adopt When Printing the Odin 2 Thumbstick STL?
For makers who are environmentally conscious, there are several strategies to minimize waste and reduce the environmental impact of 3D printing projects like the Odin 2 Thumbstick STL. One approach is to choose eco-friendly filaments, such as PLA derived from renewable resources, which are biodegradable under the right conditions. Additionally, optimizing your print settings to reduce material waste and recycling failed prints can contribute to a more sustainable workflow. Some communities also share tips on using recycled filament or upcycling scraps from previous projects. By incorporating these practices, you not only produce high-quality prints but also support a more sustainable 3D printing ecosystem.
Conclusion
In summary, the Odin 2 Thumbstick STL is a versatile and innovative file that offers unparalleled customization opportunities for 3D printing enthusiasts. This comprehensive guide has explored every aspect of the Odin 2 Thumbstick STL—from its origins and design features to the detailed printing process, material considerations, and advanced customization techniques. The open-source nature of the file and the active community support make it a standout choice for anyone looking to create a personalized, high-quality thumbstick.
By following the detailed steps outlined in this guide, you are now equipped with the knowledge to download, print, and customize your own Odin 2 Thumbstick STL. Embrace the creativity and innovation that 3D printing offers, and join the community of makers who continue to push the boundaries of design and functionality.
This article has provided a clear, step-by-step roadmap for maximizing the potential of the Odin 2 Thumbstick STL. Download the file, experiment with your design modifications, and share your success with the community. Your journey into the world of custom 3D printed components begins here.
More Posts Like
The Ultimate Guide to Total Body Enhancement
The Ultimate Guide to Microsoft Ink
money6x.com How to Make Money: The Ultimate Comprehensive Guide
Adrian CryptoProNetwork: The Comprehensive Guide
Tidbits of Experience: A Comprehensive Guide to the Ultimate Life Blog